Thursday, September 13, 2007

OMG This is so good Apple Pie


We went apple picking this past weekend and now are the proud owners of WAY TOO MANY APPLES! Since the only varieties that were available to pick were Macs and Cortlands, that's what we have. Of course, they are crying out to be made into any kind of apple-y goodness I can think of so I went on the hunt for a good, easy apple pie recipe. I adapted several recipes that I found on the net and made it my own way and it came out simply FABULOUS. Please excuse my messy counter - I have a habit of starting things without thinking ahead LOL

You will need:
  • 7 Macintosh apples or other similarly tart apple
  • 1/2 c. granulated sugar
  • 1/2 c. brown sugar
  • 2 Tbls. butter
  • 2 Tbls. flour
  • 1 tsp lemon juice
  • 1/2 tsp. salt
  • 1/2 tsp. cinnamon
  • 1 Ready-to-use pie crust (the kind you unfold)
First things first, I put the bottom pie crust into my glass pie dish and threw it in the oven while I prepared the apples.

Next, I cored the apples (didn't peel them), and then cut them into quarters, and then eighths. In a separate bowl, we combined flour, sugars, cinnamon and salt and mixed.


Next, we layered the apples into the pie dish, being careful because it's hot now. After each layer, we'd sprinkle a GENEROUS helping of the sugar mixture, until we'd used up all the apples.

Then we cut the butter up into small chunks and placed it around the apples.


Next, we placed the top crust on to the pie, pinching the pie crust closed along the edges. We cut a couple of ventilation holes on top and then rimmed the edge of the crust with aluminum foil to prevent it from burning. I also swiped a bit more butter on the crust to help it brown. I'd suggest milk, though.

Into the 375 degree oven (on a cookie sheet to prevent messy, burning spills).

I baked ours from
to


So, roughly 40 minutes. Essentially, you just want to make sure the apples are done.

The finished product. So you're saying "Ok, but you said this is CARAMEL apple pie - where's the caramel, Dawn?"

I'm not a big fan of caramel but hubby is and I do love to make him happy, so I dug this out of the fridge:

Scooped some out into a microwave safe measuring cup and microwaved it for 30 seconds.

Then I brushed it on:


Voila!


A generous portion of french vanilla on top, sprinkled a little cinnamon on and OMG This is SO GOOD Apple Pie!
Saturday, September 01, 2007

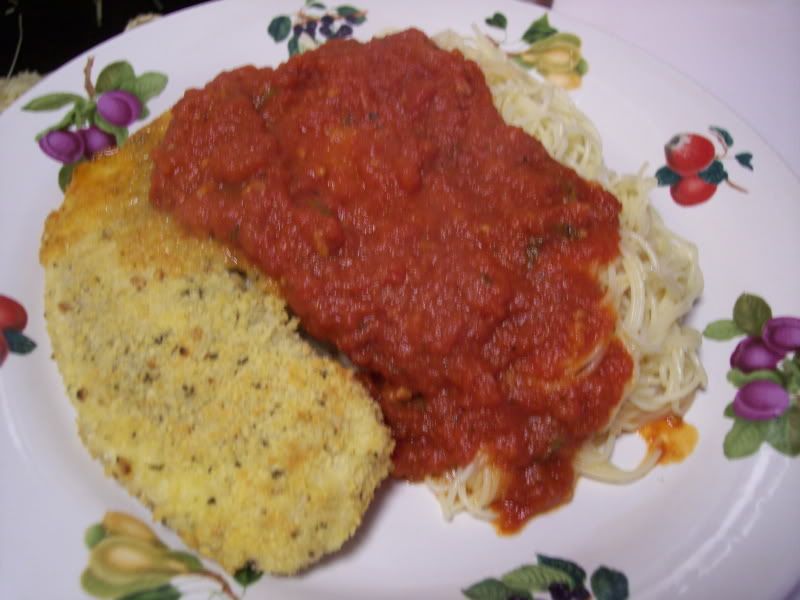
Parmesan Encrusted Tilapia w/angel hair pasta

In July, hubby & I celebrated our anniversary by ordering dinner to go and having a nice dinner at home without the hassle of trying to keep 3 kids quiet in a restaurant. I decided to order something totally different than my usual prime rib, and decided to go with their Parmesan Encrusted Tilapia, which was served with spaghetti & garlic bread. It was fabulous! Since then, I've been thinking about it and wanting it again, but not wanting to spend the kind of money it requires to feed 5 at the 99 Restaurant.

Today, while futzing around in my freezer trying to figure out what was for dinner, I came across some tilapia that I'd bought recently and put that out to defrost. I had planned on our usual (another recipe for another day), but then at the lats minute, decided to try my hand at the yummy thing that the 99 had done. The results were excellent!

4 tilapia filets, roughly 1 lb.
2/3 c. Progresso Panko Crispy Bread Crumbs, Italian Flavor
1/3 c. Great Value (walmart) brand Parmesan cheese
2 eggs, beaten
1/4 c. flour
12 oz. spaghetti, cooked (more or less, depending on how many you're serving)
pasta sauce (my recipe is below)

First off, if you've never used Panko bread crumbs, you simply MUST buy them. They're chunkier than regular bread crumbs and hold up really well to the egg/flour mixture.

So, I always check my fish to make sure there's no bones - so they're wet already. I dipped each one individually in the flour first. Then I dredged them in the EGG MIXTURE (LOL Sorry I left this out originally) and finally, each one individually went into a large freezer storage bag where I'd mixed the bread crumbs and cheese. I shook the bag gently, making sure the fish was completely coated. Onto a foil lined pan sprayed with cooking spray, and into a 425 degree oven it went. Your time may vary, of course, so check to make sure it's done (pick it with a fork - if it is flaky, it's done.)

For the sauce, I was in a bit of a hurry, but rather than use a jar sauce and ruin the flavor of the fish, I went with this quickie recipe:

1 28oz can of crushed tomatoes
5 cloves of garlic crushed
several fresh basil leaves, cut into ribbons
garlic powder, salt & pepper to taste

I browned the garlic in the 2 quart sauce pan with some olive oil. Then added the tomatoes, seasonings and let this bubble and cook down while the fish was prepared and cooked. At the same time, I put on the water for the angel hair pasta. Normally, I like a well cooked sauce, but the freshness really went well with the fish. Just as I was taking the fish out of the oven, I tossed the basil into the sauce, stirred it. I served some sauce over both the fish and the pasta and as I said, it was fabulous.

Please let me know if you make this recipe and how you like it. I would suggest using fresh parmesan, as the fake stuff really doesn't have much CHEESE flavor, imo. I will do that the next time. Also, my husband inquired "Where's the mozzarella" because anything that has sauce on it in my house REQUIRES mozzarella too. LOL So that's an option as well. Here was the finished product.


Powered by ScribeFire.