Showing posts with label chicken. Show all posts

Tuesday, February 07, 2012

Tomato & Basil Rotini with Chicken

Tomato & Basil Rotini with Chicken
For a detailed reason of why my dishes are appearing on styrofoam plates, click here.
  • 1 lb. Mueller’s Whole Wheat Rotini pasta, cooked 
  • 2 chicken breasts, cut into bite-sized pieces  
  • 1 package chicken broth powder 
  • 1 cup hot water
  • 1 lb frozen green beans 
  • 1 16oz. package Philadelphia Cookin Crème “Tomato & Basil” 


  1. Begin by essentially steaming your chicken in a skillet with the broth. This keeps the fat content down considerably, and the broth helps insure you don’t wind up with bland chicken. 
  2. Once the chicken is mostly all cooked (all the pieces have turned that white/tan color), add the bag of green beans on top. Cover for 5-10 minutes, while you boil the water for the pasta.
  3. Cook the pasta in salted water.  I’ve found that the only way to palate whole wheat pasta is to cook it beyond al dente.
  4. Once the pasta is cooked, drain thoroughly, and then return to the pan you cooked it in.  
  5. Add dollops of the Cooking Crème throughout the pasta, so that it melts with the heat of the pasta.  Once you’ve added ¾ of the package, add the now cooked chicken and green beans to the pasta pan.
  6. Add the rest of the Cookin Crème and toss gently to cover everything.
  7. Plate it and finish it off with a nice health shaving of parmesan or mozzarella.

    Dinner’s ready!  
Easy replacements would be delicious. I’ve used spinach, broccoli and a host of other vegetables. I’ve also used more than 1 at a time.  There’s more than enough Cookin Crème to cover everything.  We’ve been moving away from using a lot of meat, but I think this would also work with ground turkey, too – or really ANY meat, including maybe some pork or hamburger.  It would also work with NO meat. It’s a very versatile recipe!  Enjoy!  

Tuesday, April 05, 2011

Let's go to Philly!

Ok, that was a lame title, I admit.  I've been dealing with some pretty intense stuff that life has been throwing at me the last several months, which is why I haven't blogged about food in so very long.  Part of it was because, for several weeks, I couldn't EAT any.  Then after that, it just sort of slid downhill.  I apologize.

But I'm here with a yummy, YUMMY creation that I came up with using some Philadelphia Cooking Cream.  It's new and I got a coupon for some FREE, so hey, why not!  I have actually made this recipe three times since the Cooking Cream came out - I've tried it with all three of the flavored blends -
Italian Cheese & Herb Cooking Creme, Savory Garlic Cooking Creme and Santa Fe Cooking Creme.It really works well with all three flavors!

So here's the recipe:
  • 3 boneless chicken breasts
  • Frozen veggies of your liking. I used italian green beans.
  • Philadelphia Cooking Cream - name your flavor
  • chicken broth - approximately 1 cup
Cut the chicken breasts into bite-sized pieces. In a large frying pan, cook the chicken in the chicken broth - basically, you're poaching the chicken.  You could also use some vegetable oil or butter to brown the chicken instead. I'm trying to keep the fat content down in our meals, so I went with chicken broth.  Once the chicken's cooked through, I add the vegetables.  Just simmer the two together as the broth evaporates.  Once it's mostly gone, I add the cooking cream.  It's much softer than regular cream cheese, so it melts and you just toss to coat everything.  You have a whole meal in one pan - my favorite kind!

In the summer, I plan on trying this with some fresh zucchini from the garden!

The 3 chicken breasts are enough to serve our 5, plus some for leftover :)

Finally, if you click THIS LINK HERE and answer a couple of questions about this "conversation" that you've just read here about Philly Cooking Cream,  you will be entered into a drawing for $1,000. :)  When it asks for the name of the person who you "talked to", just use my first name, Dawn.  Thanks!

Thursday, August 26, 2010

Italian Grilled Chicken & Mrs Dash

One of the toughest part of getting older is, for my husband and I at least, to cut down on the things that we've always enjoyed.   Salt, of course, is one of those things that makes EVERYTHING taste better, but does NOT do nice things for things like blood pressure – and of course, we’re both heavily cursed with family histories. So that means that we have to be especially mindful of our salt intake on a daily basis as well as educating our children about the dangers of excess so that they grow up healthier than we have.

Mrs. Dash has helped us do that.   Creating flavorful low-sodium meals for our family, without having them reaching for the salt shaker the minute the food hits their mouths, is made much easier with the variety of products that Mrs. Dash has available.  My favorite – or I should say, ONE of my favorites, is the italian medley, which I use in any manner of ways, including this one.

Grilled Italian Chicken

  • 1 lb (or more) boneless chicken breast
  • Mrs. Dash Italian Medley

Heat your grill up at least 5-7 minutes to be sure the grate is nice and hot.  While it’s heating, sprinkle the Mrs. Dash Italian Medley seasoning blend over the chicken breasts, both front and backside.  Once the grill is hot, place the chicken on the grill.  Leave it there for at least 5 minutes – do not mess with it.  Leave it alone!  After about 5 minutes, the chicken will have seared well on the grates and should be readily released when you grab it with your tongs.  Flip it and cook for another 3-4 minutes or until a meat thermometer registers 165 degrees F.

Enjoy! 

I serve this with a salad and everyone just LOVES it.  You could also serve it with some nice (no salt added) pasta sauce and pasta.  Let it cool and throw it in a salad.  There’s no limit!

I know I can be assured that the Mrs. Dash seasoning blend I choose for whatever I’m cooking will be safe for us to use, and it’s one less thing I have to worry about.  Win Win!


I wrote this blog post while participating in the Mrs. Dash and TwitterMoms blogging program for a chance to get a $50 gift card. For more information on how you can participate, click here.  Thank you!


Flavorful, Family Meal IdeasMore Mrs. Dash Recipes

Friday, March 26, 2010

Food trip Friday PLUS Photo Friday

I like doing memes from time to time, and these are both pretty new to me.  Food Trip Friday is where you post a food – any kind of food.   Photo Friday is where you post a photo that represents the word of the week – this week’s word is PLEASURE.  Food is pleasure to me, AS IS photography.  Two of my favorite things – food and photography!  So here ya go!

If you are new to my blog, welcome!  Please take a moment to click on the “follow” or join my facebook fan page if you like what you see.    The more, the merrier!

I chose this photo because of the colors in the photo, which I love, but also because it demonstrates the complexities of cooking, which I love as well!  A twofer!

spices

And, of course, because this IS a recipe blog, afterall, the recipe that this came from!

I decided to (re)do another of my favorites from my blog, the Grilled Southwest Chicken recipe that I’d gotten from an old blogging friend, Karen – formally of Pediascribe – but now blogging at Forgiven & Loved.


In any case, it was a hit then, but not so much of a hit this time.  I think it’s because I tried to tweak it by adding a new favorite of mine, LIME, and doubling the spice/oil mixture.  IT didn’t work – do NOT try it. LOL  Follow THIS recipe instead :)


Grilled Southwest Chicken

4 Boneless, skinless chicken breasts
2 Tbs olive oil
1 tsp each cumin, oregano & chili powder
3 cloves garlic, crushed

1 teaspoon(ish) lime juice.  DO NOT USE LOL
salt & pepper to taste

steps Mix the spices in a bowl together with the oil. 


Poke chicken breasts with a fork.


In a zipper-type bag, place chicken breasts and spice mixture. Mush together so that each breast is coated. I let mine sit for about 10 minutes while the grill heated up.

Grill the chicken approximately 10 minutes on one side, flip and another 5 on the other.

chicky

Be sure to visit my other blog, Coming to a Nursery Near You, for my other take on the photo friday theme as well :)  Thanks for visiting!

Tuesday, March 23, 2010

Grilled chicken salad, redux

I don't think it gets much easier than this, truly.  I've made grilled chicken salad before, but this may be my new favorite.

Sunday morning, I woke up and knew it was going to be a busy day. My son's first hockey game of the year was Sunday afternoon, and I had errands to run, shopping to do, and my husband did too.  So I took a package of McCormick's Grill Mates Baja Citrus Marinade, mixed it (per the directions) and threw in 4 boneless chicken breasts, which I'd poked a few times with a fork.  It all went into a large zipper bag and into the fridge for the rest of the day.

8 hours later, at 6 pm, I had turned on the grill to a medium flame.  Once it was heated, I put the chicken on and closed the top.  I went to work assembling my salad, which was (admittedly) lacking in ingredients.  But a half a head of iceberg, some croutons and some Roma tomatoes later, and it looked good anyway.  Not very exotic, but it had been a LONG day.

The chicken took at least 20-25 minutes to cook.  But ALL I had to do was turn them, and once they registered the appropriate 165 on the thermometer, they were ready to go.  I sliced them up, placed them on our salad, topped with some spray on salad dressing (vinaigrette, actually) and mmmmMMmm - combined with another version of my new favorite flatbreads, it was a delicious and SIMPLE dinner!

The chicken came out so juicy and so full of flavor - my kids loved it as well.  Next time, I'll make it and slice it for wraps - Yum!

Friday, January 15, 2010

Spanish Rice & Chicken Casserole

Ok, I really don’t know what to call this recipe, but it’s so good, you won’t care what the name is.

I was feeding my family of 5, so these are the amounts I used to make probably twice as much as I really needed, but YAY for leftovers!

Spanish Rice & Chicken Casserole

  • 2 boxes (store brand) Spanish rice mix
  • 1 14.5oz can stewed tomatoes (zesty style)
  • 2 half chicken breasts, boneless
  • Shredded cheddar cheese
  • Light sour cream
  • flour tortillas
  • 1 cup frozen corn
  • 1 cup frozen spinach
  • 1 really big skillet!

First off, I sliced the chicken breasts into 1/4” medallions and then sauteed them in the skillet with a very light coating of butter.  Once they’d started cooking, I added one package of Spanish rice seasoning mix to the pan and coated the chicken.  I cooked the chicken for approximately 3 minutes, then removed it from the pan to a plate.

Next, I prepared the rest of the Spanish rice as directed but because I only had 1 can of stewed tomatoes, that’s all I used.  Once the rice had been “browned”, I added the seasoning mix, water, tomatoes according to package. I also added the chicken back into the mixture, along with the cup of frozen corn and cup of frozen spinach.  I added these things in because well, corn goes great with mexican anything, and they’d never notice the spinach and they could definitely use the added nutrients!

I let the huge mixture cook for probably 30 minutes or until the juices had all be absorbed by the rice, and then I topped it with maybe 1/2 a cup of shredded cheddar.  I heated up some tortillas in the microwave and my family chose whether they’d have it on that or in the bowl or both.  It was DELICIOUS, both of my kids wanted 2nds – and even though there was some spiciness from the “zesty” tomatoes, they both agreed that it was awesome.

Now I like to figure this out, too

spanish rice mix x 2 - $2

can of tomatoes x 1 - $1

1 lb chicken  - $2

frozen veggies - $1

tortillas - $1

$7 for a full, satisfying and nutritious meal that served my 5, plus 2nds, plus still PLENTY for today’s lunch!

The ooos and ahhhs of a well-fed family?  PRICELESS! LOL

DSC_7300

Notes:  I’ve made this similarly with hamburger before, but now that I’m thinking about it, I would bet it would be great with pork as well. 

Friday, April 03, 2009

4 for $15?

4 15.  That’s Shaw's new “thing” to entice people.  Four meals for under $15.  Not whole meals – 4 servings.  So you can feed your family of 4 for under $15.

Isn’t that big of them!

For $15, I can make 4 FULL dinners.  Because we’ve always had to live rather frugally, this new era that Americans are finding themselves in, the one in which they can’t be hitting MdD’s 4 times a week – is really nothing new to me. 

The trick, really, is to know how to shop.  You don’t buy things based on need. You buy things based on sales.  You stock up on things when they’re on sale, and then you don’t have to pay sometimes double the price when you need them.

This works particularly well with meats, although, obviously, you need a freezer large enough to accommodate good sales. 

Here’s an example:

Yesterday, I bought 1 lb of Butterball ground turkey.  It was on sale for $1.99 – it’s normally $3.99 or higher.

I would typically buy 2 or 3 of them, because I use it quite frequently.  (I didn’t this week because I have no room in my freezer.)

I also bought a pound of egg noodles that were on sale.

I went home and cooked the turkey up, with some salt & pepper.  I combined it with a jar of spaghetti sauce (Spinach & Cheese Florentine is awesome!), boiled the egg noodles, and voila.  I had a meal for way more than 4 people – for way less than $15! 

$1.99 – turkey

$1.99 – sauce

$1.29 – egg noodles

$5.27  - and enough for dinner for 5 and more than enough for lunch the next day for all of us.  So figure it, in total, fed 8 (at least).   $.65 for a meal is much more acceptable to me than $15!

I’ve already noticed that Shaw's also has boneless chicken breast on sale this week.  $1.88/lb is an excellent price, so I will buy 2 or 3 packages of it. 

There are tons of things I can make with boneless chicken breast, so I am not worried that I’ll put it in the freezer and it won’t get used.  In fact, one of the recipes I made with turkey, http://nhmom.blogspot.com/2008/12/turkey-pot-pie-with-corn-bread-stuffing.html, I will just substitute chicken for turkey with.  So figure $5 for the chicken, $1 for the box of stuffing, $1 for the gravy (if I’m feeling lazy and don’t make my own).  I got the pie crust for free with a coupon. 

Simple recipe, and delicious.  WAY less than $15.

What are some of your favorite recipes that are budget conscious?

Thursday, November 13, 2008

Chicken Cordon Bleu & Chicken Fregula

Last weekend, I happened to be watching food network when a (new to me) show came on.   Secrets of a Restaurant Chef with Ann Burrell was the show and I enjoyed watching her and made a note to look for a particular side-dish that she’d made called fregula.  Basically, they’re little balls of pasta.  Bigger than a pastene but smaller than ummm… a ravioli LOL  Otherwise known as Isreali couscous, I managed to find it at the health food store in the bulk bin and it was very cheap.  I only bought what was about 1 cup because I didn’t know if we’d like it.   Then it sat in the paper bag for the last week and a half while I thought about how I’d like to make it.  I wasn’t going to make it like her, but haven’t been feeling really inventive in the kitchen as of late. (Read why on my other blog :S)

So this weekend, I was watching food network again and found myself drooling over Tyler Florence’s version of chicken cordon bleu.  I made sure to buy some proscuitto this weekend, and provolone cheese and then all that got thrown in the fridge as well LOL

Finally, I found the enthusiasm to cook tonight, and oh what a deliciouso dinner!  Give yourself some time for this – but believe me, it’s worth the effort.

Chicken Cordon Bleu

  • 4 boneless, skinless chicken breasts, pounded out flat.
  • 2 slices of prosciutto ham
  • 2 slices provolone cheese cut in half
  • 2 eggs - scrambled
  • 1 cup panko breadcrumbs
  • 1/2 cup flour

I pounded out the chicken breasts with the flat side of my mallet while it was inside a storage bag.    Once they were all an even thickness, I took a slice of prosciutto and tore it down the center because it was quite thick and I didn’t want it to be overwhelming in the chicken.  I topped the ham with the 1/2 slice of provolone cheese.  I rolled the whole thing up slowly and and then wrapped the chicken in wax paper, keeping it tightly rolled.  Once they were all done, I put them in the freezer for approximately 40 minutes or so.

Once they were in the freezer, I began the preparation for the fregula.

Chicken Fregula

  • 1 cup fregula
  • 2 cups chicken broth
  • 1/2 small onion, diced
  • 2 cloves garlic, minced
  • 1 Tbsp. unsalted butter
  • 1 Tbsp. olive oil

In a 2 qt. saucepan, I melted the butter and added the olive oil (the olive oil helps  to keep the butter from burning).  To that, I added the onions and garlic and stirred it frequently to keep the garlic from burning.

Once the onions & garlic were softened, I added the fregula and mixed it in to be sure that it was all coated.  I added the 2 cups of chicken broth and brought it to a boil.  I then lowered the heat, covered the pan and simmered it while I began the prep for finishing the chicken. (probably about 20 minutes on low) – the fregula will absorb the broth, so keep an eye on it.

Back to the chicken, I scrambled the eggs into one bowl.  I placed the flour in another bowl.  In the third, I added the panko breadcrumbs, along with salt, pepper and just a sprinkling of  poultry seasoning.

I removed the packages of chicken from the freezer, where they’d stayed nice and cold, and therefore held together very well.  Working quickly, I dipped each chicken breast into the flour, coating it on all sides.  Then I dipped it into the egg and then finally coated it in the bread crumbs. 

In a skillet, I heated a Tbls. of canola oil and placed the breaded chickens into the skillet.  At this point, I don’t know WHY but I had the heat up too high and next thing I knew, I could smell burning breadcrumbs.  Gah!

So I took them out of the frying pan and placed them into an oven pan, put the oven on 425 and cooked them for roughly 30 minuts or so – I had the meat thermometer in them and took them out at 175°. They were moist & delicious! The fregula plumped up with the chicken broth and was just amazing.  (click on the photos for better detail)


101_0949

101_0950


 101_0953

Wednesday, October 29, 2008

Cristina Ferrare’s Chicken Pot Pie with Cornbread Crust

I watched Oprah last week when she had Cristina Ferrare on, talking about how to stretch your dollar in today’s lousy economy.  She prepared this and it just looked so good, I had to try it.

Filling:

  • 1 Tbsp. olive oil
  • 1 Tbsp. unsalted butter (I omited this, but used more olive oil)
  • 1 medium Onion , chopped
  • 1/4 cup flour
  • 2 cups chicken stock
  • 2 cups chopped Roasted Chicken (I used roasted boneless chicken breast)
  • 1/2 cup frozen sweet petite peas
  • 1 potato , diced and boiled
  • 1 1/2 cup chopped, cooked carrots
  • 1/2 tsp. salt
  • Cracked pepper
  • Dash of Tabasco® sauce (I omitted this)
Crust:
  • 3/4 cup white or yellow cornmeal
  • 3/4 cup flour
  • 1 Tbsp. baking powder
  • 1 1/2 Tbsp. sugar
  • 1/2 tsp. salt
  • 3/4 cup milk
  • 1 large egg
  • 2 Tbsp. canola oil

To make filling: Preheat the oven to 400°. Spray a 2-quart casserole with cooking spray. In a large sauce pan, heat olive oil and unsalted butter together. Add onion and sauté until tender, about 4 or 5 minutes. Add in flour until blended. Slowly stir in 2 cups of heated chicken stock, whisking well. Cook mixture over medium heat until thickened and bubbly, about 4 minutes. Stir in chicken, peas, potato, carrots, salt, pepper and Tabasco®. Pour into a 2-quart casserole dish coated with cooking spray and cook until heated and thickened. Spread eventy into an ovenproof dish. 
To make crust: In a bowl, stir cornmeal, flour, baking powder, sugar and salt. Stir milk, egg and canola oil until well combined. Stir wet ingredients into dry ingredients. Spoon the batter evenly on the filling. Bake until the top is golden brown, about 22 to 25 minutes.

101_0877

My finished product.  In the prep, I had to use more than 2 cups of broth – and then, after it was baked and spooned out into the bowls, I found that the corn bread had absorbed virtually all of the “gravy” , so I thought it to be kind of dry.  Everyone else loved it.  I’m not sure how else I’d fix it to make it better though.  I will say, though, that it was extremely satisfying to make something completely from scratch!  No canned veggies, no boxed corn bread. Everything fresh!  It’s much cheaper too.

Monday, May 19, 2008

Garlic Chicken w/sweet roasted pepper sauce

I've been cooking up all sorts of yummy new meals, and decided I just had to take some time and actually post them!

This recipe comes from a new sort of program that Shaw's Supermarkets has going on with America's Test Kitchens - they provide the recipe cards, free - and of course, you buy the ingredients (cute how that works huh?).  In any case, that's where this recipe comes from! 

Garlic Chicken w/Sweet Roasted Pepper Sauce

  • 4 boneless, skinless chicken breasts
  • salt & pepper
  • 2 Tbls. vegetable oil
  • 1 sm. onion, sliced thin
  • 6 garlic cloves, sliced thin
  • 1 12oz. jar roasted red peppers, drained & chopped
  • 2 tsp. sugar
  • 1-1/2 c. low-sodium chicken broth
  • 1/4 c. fresh basil, chopped
  • 2 Tbls. unsalted butter

In my photo, you'll see more than 4 chicken breasts because the ones I had were really big, so I cut them in half to cut down on cooking time.

chicken_pan Pat chicken breasts dry and season with salt & pepper. Heat oil in large skillet over medium-high heat.  Cook chicken until golden brown, about 5 minutes per side.  Transfer to plate.


onionsAdd onions to fat in the skillet and cook until lightly browned, about 3 minutes.  Stir in garlic and cook until fragrant, about 1 minute.  


in_the_pot

Add peppers, sugar, broth & browned chicken, along with any accumulated juices and bring to a boil.  Reduce heat to medium and simmer until chicken is cooked through, about 5 minutes (make sure your chicken is 160°F please!)  


Transfer chicken to serving platter and tent with foil.  Return skillet to high heat and simmer until sauce is slightly thickened, about 5 minutes.  Off heat, whisk in basil and butter.  Season with salt and pepper.  Pour sauce over chicken & serve.

chicken_finished

It really was as good as it looks!  It was very quick to make (their whole series is 30 minutes or less recipes) and I'll definitely make it again!


Wednesday, April 09, 2008

Crockpot Cooking at it's finest

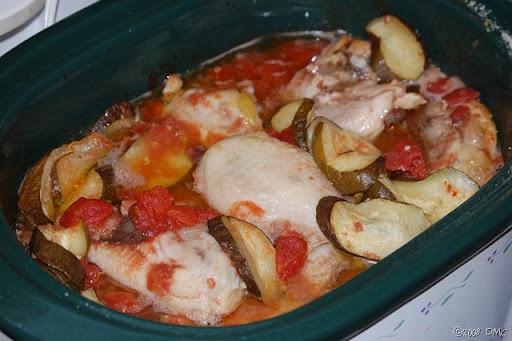
I was feeling pretty uninspired this morning when I was digging around in the new chest freezer we'd bought last month.  I know that in order to keep the food from getting freezer burned, I must use it!  So I reached to the bottom and pulled out a family sized package of chicken thighs.  Hmm... what to do with them?  Again, completely uninspired, I ran them under some hot water just long enough so I could whack them on the sink to break them into 2 chunks small enough to fit into the crock pot.  I sprinkled onion salt and garlic powder liberally, then I opened a 28oz can of diced tomatoes and poured that on top.  I covered it and turned it up to high.

Around noontime, I was looking in the regular freezer and came across some sliced zucchini I'd made before our vacation - to be honest, I can't even really remember how I cooked it - it may have been in Italian dressing, but one can't be too sure.  Eh, that's ok - I tossed the frozen lump of zucchini into the crock pot as well.  About an hour later, it was defrosted enough for me to stir the whole thing up, making sure the zucchini got covered up in tomato'ey goodness.  The aroma in my house is Soooooo Goooood!

In about an hour, I'll go back to the kitchen and stir things up again and also put on a pot of water to boil.  I'll make some sort of pasta (not really sure what I have at the moment) and poof - dinner will be done!  The zucchini is very thinly sliced, so I'm betting it'll fall apart nicely - because my kids don't purposely EAT zucchini, this is a good thing that it falls apart :)

DSC_2151

Now, for those of you who aren't too thrilled with chicken thighs, this recipe could easily be accomplished with any other cut of the chicken, just adjust your cooking times for boneless!

Also - if you'd like the chicken to be browned, you could brown it in the frying pan before or spoon the whole thing into a casserole dish when it's done and throw it under the broiler.  Me? I don't mind albino chicken!

Enjoy!

To recap:

10-12 chicken thighs (frozen)
1 28oz can diced tomatoes w/juices
garlic powder
onion salt
sliced zucchini

Yum!

Tuesday, July 31, 2007

Carnival of the Recipes - Crockpot Edition Yum!

I simply LOVE my crockpot. I don't know what I ever did without one, and I insist that anyone that doesn't' have one, go and get one! Right now - I'll wait.

Got one?

Good.

Is it nice and big? Does it have multiple heat settings? GOOD!

We're good to go.

Presenting.............

Dawn's Too Lazy to Cook Chicken in a Crockpot Recipe :)

Now, one of my most favorite recipes for the crockpot I made up by accident - as usual, I'd realized that I had NOTHING in mind for dinner, so I looked in the freezer for inspiration. I had a package of frozen chicken thighs. Ok, that'll work.

So I tossed the 2-3 lb package of frozen chicken thighs into the crockpot, still frozen hard as a rock. I then sprinkled Lawry's garlic salt on both sides. I put the cover on and set it on low (or if it's near noon, I put it on high) and left it alone THE ENTIRE DAY.

No water, nothing.

Just chicken and garlic salt.

Around 4pm, I follow my nose and go check out the crockpot - omg it smells heavenly! There's now a whole bunch of juices in there that've come from the chicken and so I toss in approximately 1 cup of instant rice (or minute rice or whatever) and cover it again.

At 5pm,w hen we eat dinner, it's ready. It's fabulous. The meat falls off the bone, the rice tastes wonderful from the chicken drippings. It's just fab-u-lous!

So there's Dawn's too lazy to cook Chicken in a Crock pot Recipe :)


This recipe was submitted as part of Carnival of the Recipes - Crockpot Edition, hosted by Slowcooker recipes (had you guessing there for a minute, didn't I?)

Monday, June 04, 2007

A+ Southwest Grilled Chicken Salad


Ok, so I did go ahead and use the leftover chicken from the Southwest Grilled Chicken and here's the nutritional info for my salad.


Southwest Grilled chicken salad

Ingredients

* Romaine Lettuce (salad), 1.5 cup, shredded
* Spinach, fresh, 1.5 cup
* Ranch dressing, 2 tbsp
* Red Ripe Tomatoes, 1 slice, medium (1/4" thick)
* Feta Cheese, .25 cup, crumbled
* Southwest Grilled Chicken Breast, no skin, 0.5 breast,

toss your lettuce & spinach with the salad dressing first, coating all the leaves.

add in the chicken breast, shredded

finally, toss with feta and add the tomato. Enjoy!

Nutritional Info

* Servings Per Recipe: 1
* Amount Per Serving
* Calories: 395.1
* Total Fat: 23.9 g
* Cholesterol: 111.8 mg
* Sodium: 769.3 mg
* Total Carbs: 8.1 g
* Dietary Fiber: 2.6 g
* Protein: 36.4 g

A+ Southwest Chicken, courtesy of Pediascribe


I made such a delicious dinner last night, and it was SO HEALTHY! This recipe came from Karen over at Pediascribe.com and really was excellent. Even the kids liked it, and they're always so IFFY about things. Just a note to Karen - I did do things slightly different, i.e. the ziplock thing & making the paste but still - YUM :)


Anyways, here's how it goes:

A+ Southwest Grilled Chicken

Ingredients

4 Boneless, skinless chicken breasts
2 Tbs olive oil
1 tsp each cumin, oregano & chili powder
3 cloves garlic, crushed
salt & pepper to taste

Mix the spices in a bowl together with the oil. In a ziplock-type bag, place chicken breasts and spice mixture. Mush together so that each breast is coated. I let mine sit for about 10 minutes while the grill heated up.

Grill the chicken approximately 10 minutes on one side, flip and another 5 on the other.

If you have leftovers, (which you probably won't!), throw it in a salad the next day - YUM!


Nutritional Info

* Servings Per Recipe: 4
* Amount Per Serving
* Calories: 266.1

* Total Fat: 3.1 g
* Cholesterol: 136.9 mg
* Sodium: 154.7 mg
* Total Carbs: 1.2 g
* Dietary Fiber: 0.3 g
* Protein: 54.8 g

I served this along with This and it was a huge hit!

Wednesday, May 16, 2007

Eggplant & Chicken Stew


Ingredients

* Eggplant, fresh, 637 grams (1 lb 6oz) - cut into 2" chunks
* Zucchini, 303 grams (10.7 oz) - sliced
* Summer Squash, 2 medium (13.1 oz)-sliced
* Garlic, 4 cloves - crushed
* Onions, raw, 139 grams (1 med 4.9oz) - chopped
* Great Value Petite Diced Tomatoes, 1.75 cup (1 can)
* Olive Oil, 1 tbsp
* Chicken Breast, no skin, 14 ounces - cut into bite-sized pieces

Nutritional Info

Fat: 3.5g
Carbohydrates: 15.6g (5.1 fiber)
Calories:165.2
Protein: 18.4g

Begin by chopping your eggplant into 2" chunks. I peeled my eggplant, but you can leave it unpeeled if you want.

Slice the zucchini & summer squash - I used 1/4" slices. Chop the onion, crush the garlic.

In a stew pot, brown the garlic & onion in the olive oil. Add

Next, add the can of tomatoes and bring to a bubble over medium heat.

Add the eggplant and reduce heat to low. Cook for 45 minutes.

Add the zucchini and squash and cook an addition 30 minutes, or until vegetables are to your desired tenderness.

The original recipe suggested adding mushrooms & chickpeas, but I didn't so it's not in this recipe. Her original recipe, by Revasean, is simply named Eggplant Stew, and is the basis of this recipe.

I would say this makes 6 good sized servings and would be great served with a nice salad.

Number of Servings: 6

Friday, April 21, 2006

Crispy wings with peanut dipping sauce

Crispy Wings with Peanut Dipping Sauce

wings:
  • 4 lbs chicken wings (split apart, preferably)
  • salt & pepper
  • 1 Tbls. canola oil, plus more for pan
  • 2 tsp dark sesame oil
  • 1 scallion, thinly sliced
  • 3 limes, cut into wedges
sauce:
  • 1/3 c. creamy natural peanut butter
  • 1/4 c. unsweetened coconut milk
  • 4 tsp lime juice
  • 4 tsp reduced sodium soy sauce
  • 1 Tbls. minced fresh ginger
For the wings: heat oven to 400°F. Lightly oil a baking pan.

Rinse chicken and pat dry with paper towels. Season well with salt & pepper. Heat canola oil in a skillet over medium-high heat. Brown wings in batches, 3 to 5 minutes per side. Place browned wings in a single layer on baking sheet, brush with sesame oil and bake for 8 t 10 minutes.

For the sauce: Puree' peanut butter, coconut milk, lime juice, soy sauce and ginger in a food processor or blender.

Garnish wings with scallions and serve with peanut sauce and lime wedges.


Per serving:
Cal. 760; fat 37g; protein 89g; carb. 7; fiber 2

These were EXCELLENT! I even used chunky peanut butter and it was awesome. We'd never had anything like this, but it was really good.

Monday, March 20, 2006

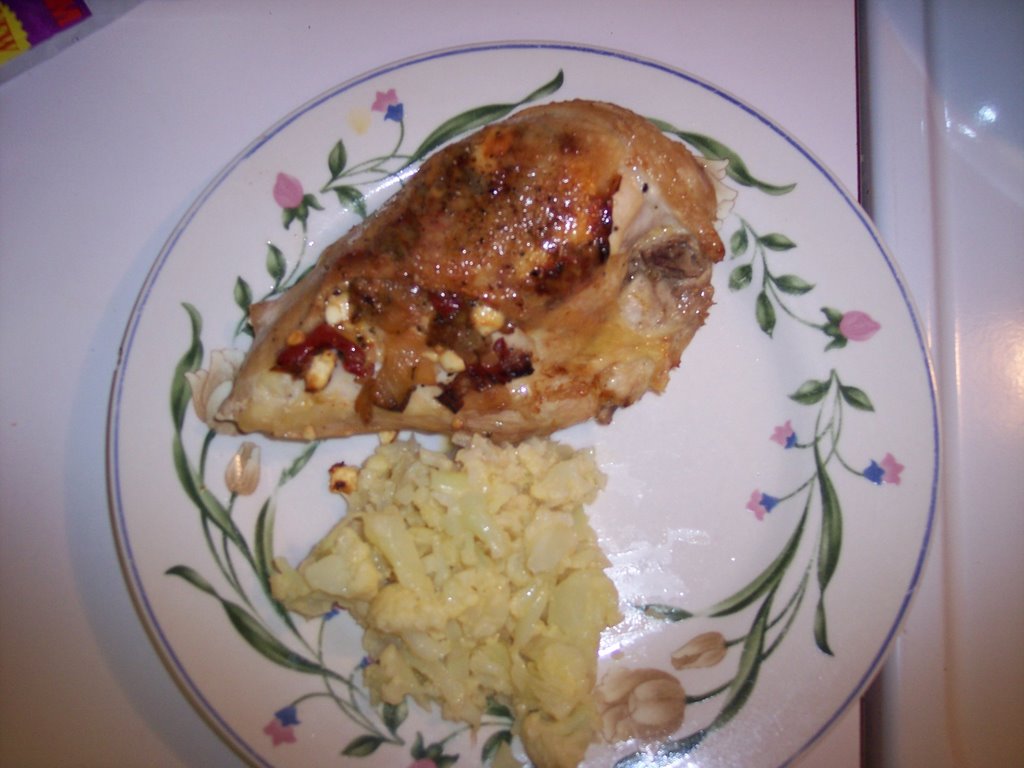
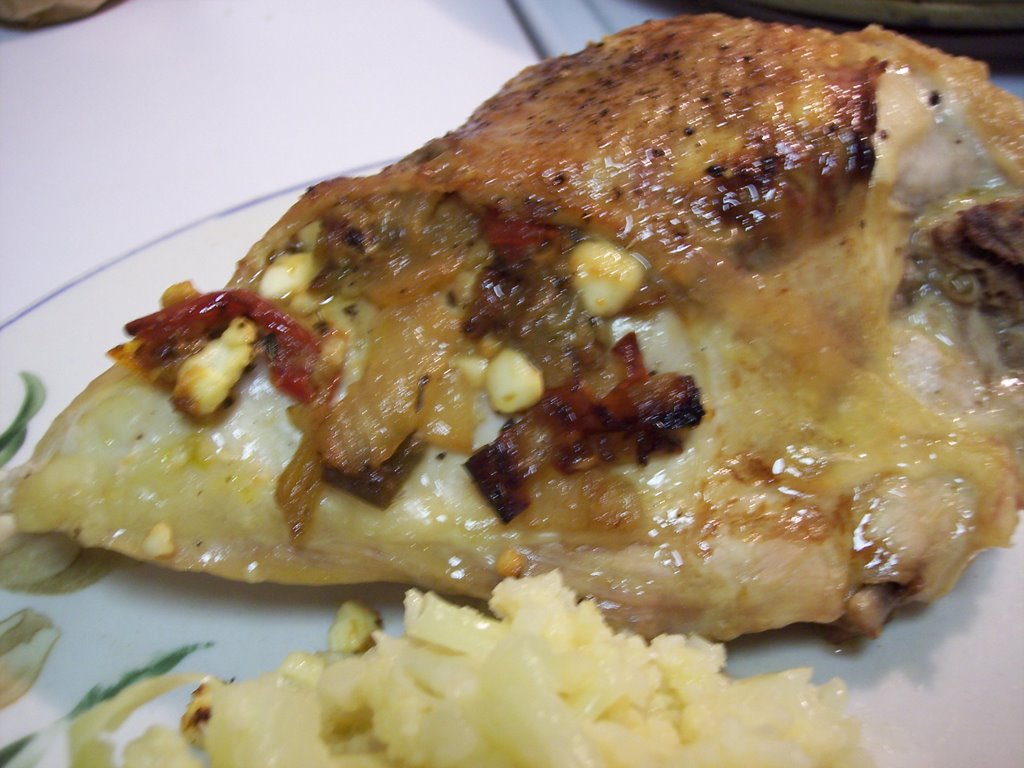
Revised Pepper Stuffed Chicken


Pepper Stuffed Chicken

  • 1 Tbls Olive Oil
  • 1 onion, chopped
  • 2 red bell peppers, cut into strips
  • 2 cloves garlic, pressed
  • salt & pepper to taste
  • 1/2 tsp. oregano
  • 1/2 tsp. basil
  • 1/4 c. Feta cheese
  • 4 chicken breast (with skin & bone)
  • 3/4 c. white wine (I use Apple Fruitesia from Shaws market)
  • 1 T. butter
Preheat oven to 425 F.

In a skillet, heat the olive oil, add the onion, pepper, garlic, salt & pepper, and herbs and cook until onion is translucent and peppers are soft. Let cool. When cooled, add the cheese, tossing well to distribute.

In the meantime, prepare chicken. Loosen the skin of the chicken and stuff 1/4 of the mixture in between skin and flesh. Sprinkle the tops with salt & pepper and place in a metal baking dish.

Roast chicken for about 30 to 40 minutes (mine needed about an hour, and I checked them with a meat thermometer first) or until chicken juices run clear when pierced. Remove hte hcicken from the pan and keep warm.

Heat the pan on the stovetop, about med. high heat. Add the white wine and using a whisk, get all the browned bits. Let the pan juices reduce reduce to about half. Remove the heat, add the butter, whisk well, and serve over the top of chicken.

Per Serving:
639 calories; 35g fat; 8g carb; 2g fiber; 202mg cholesterol; 321 sodium.

Tuesday, January 10, 2006

Dawn's Super Tasty Chicken Salad


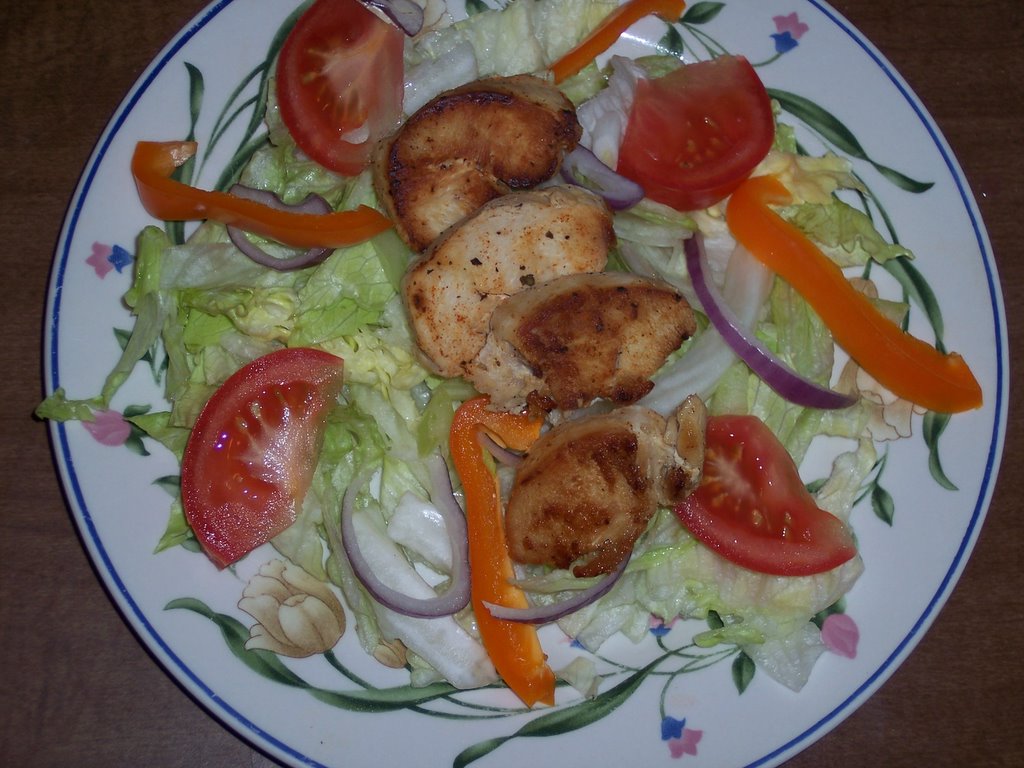
Look at what a pretty dinner I made last night for the whole family. It was so simple to make!

Now, the chicken I used I'd already pre-cooked when I bought it (AWESOME deal on boneless breasts), so all I had to do was slice it into about 1/2" slices and then I put it in the frying pan with about a tbls. of olive oil. I sprinkled some cajun seasoning on it and let it heat up. When they were getting some color, I flipped and added some paprika (just a sprinkle to give it some color). Meanwhile, I put on the plate:

  • 2 cups shredded lettuce
  • 4 strips of fresh orange pepper
  • some red onion on mine
  • thinly sliced tomato wedges
  • 1 tsp. milled flax seed
  • 3 oz. chicken breast
I finished it off with 2 tbls of ranch dressing (after the photo) and it was awesome!

Thursday, September 29, 2005

Sliced Lemon Almond Chicken over Greens

Sliced Lemon Almond Chicken over Greens
courtesy of Me and Cooking Light Magazine

  • 3/4 c. cornflakes (I used wheaties)
  • 2 tbls. almonds, toasted (I used slivered)
  • 1 tsp grated lemon rind
  • 1/2 tsp salt, divided
  • 1/2 tsp black pepper, divided
  • 4 (4-ounce) skinned, boneless chicken breast halves
  • Cooking spray
  • 6 C. gourmet salad greens
  • 1 tbls. fresh lemon juice
  • 1tsp. olive oil
  • Lemon wedges (optional)
Combine cornflakes, almonds, rind, 1/4 tsp salt & 1/4 tsp pepper in a food processor; pulse until coursely ground. Place crumb mixture in a shallow dish.

Place each breast half between 2 sheets of heavy-duty plastic wrap. Flatten to 1/4-inch thickness using a meat mallet or rolling pin. Dredge the chicken in a crumb mixture.

Heat a large nonstick skillet coated with cooking spray over medium heat. Add chicken, and saute' 5 minutes on each side or until done. Cut chicken into 1/2 inch strips; set aside.

Place salad greens in a large bowl. Combine 1/4 tsp salt, 1/4 tsp pepper, juice and oil, and drizle over salad greens, tossing gently to coat.

Divide the salad greens and chicken evently among 4 plates. Garnish with lemon wedges if desired.

Per Serving:
Calories 187; Fat 5.6; protein 29; carb 10; fiber 2; cholesterol 66; iron 2.5; sodium 427

My notes:

Although the recipe called for pistachios, I iddn't have any and used almond slivers instead. As well, the recipe originally called for you to coat the chicken in HONEY, but I totally forgot to do it, and it came out excellent anyway, so I left it out and adjusted the nutritional to reflect that. My son loved this, and since he's so picky, I figured this is a good sign! We loved it as well, even with the slightly odd dressing on the greens. :)


Thursday, September 22, 2005

Skillet Chicken w/ Honey-Mustard Mayo

Skillet Chicken w/Honey-Mustard Mayo
  • 4 boneless, skinless chicken breast halves
  • salt & pepper to taste
  • 1/2 tsp garlic powder
  • 1/4 tsp thyme
  • 1/8 tsp cayenne pepper
  • 1 Tbls olive oil
Honey-mustard mayo
  • 1/4 c. low-fat mayo
  • 1-1/2 Tbls honey
  • 2 Tbls Dijon mustard
To make the chicken: on a dinner plate, season the chicken breasts on both sides with the seasonings.

In a skillet, heat the olive oil over medium-high heat and saute' the chicken, browning well for about 5 minutes each side, or until chicken is cooked through.

To make the honey-mustard mayo: in a small bowl, whisk together all the ingredients.

Serve each cooked breast with a dallop of mayo sauce on top.

Per serving:
231 calories; 9g fat; 28g protein; 8g carb; trace fiber; 73 cholesterol; 242 sodium

I actually served the breasts sliced into medallions, and put the sauce on the side. Everyone loved it.