Tuesday, December 16, 2008

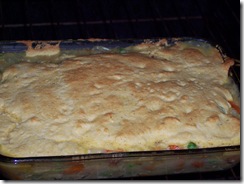
Turkey Pot Pie with Corn bread stuffing

I know, a lot of people might be SICK of turkey by now, but I made something SO delicious with my leftover turkey that I just had to share it. 

Now, to explain – on Thanksgiving, I wasn’t happy with the way our turkey came out. The thermometer told me it was done, and I listened to it.  The thermometer was faulty, and so as a result, I had to put the turkey  back in the oven for another hour right when it was actually time to serve.  Then it just wasn’t as good as it should have been.  So a week later, I made another turkey, and that one came out fa bu lous.  Still, it was a lot of turkey, and after several sandwiches, it sat in the fridge for several days.

Finally, inspiration hit and I did this pot pie.

  • 1 pre-made pie crust
  • 2 cups shredded turkey
  • 1- 1 1/2 cups turkey gravy
  • 1 box cornbread stuffing
  • 1-1/2 cups chicken broth
  • 1/2 onion, diced small
  • 1 stalk celery, diced small
  • 2 Tbsp. butter
  • 1 Tbsp. olive oil

I pre-baked the pre-made pie crust for about 10 or 15 minutes at 350..

Meanwhile, I heated the turkey & gravy in a sauce pan. Use your judgment on the amount of gravy – you do not want it to be soupy.  It will just soak through the pie crust and make mush.

Sauté the onion & celery in a skillet until translucent.   Combine in a large bowl with the pre-packaged cornbread stuffing and mix unti well combined.  Moisten it with the chicken broth – folding the mixture together.

Remove pie crust from oven and pour turkey & gravy mixture into the shell.  Top with the stuffing, and be sure to pat it down so that it’s  “snug”.  This will help keep the slices together when it’s finished.

Return the pie to the oven and cook for 30-40 minutes or until the top of the stuffing crust is crisp & brown.  Remove from the oven and let it sit for 5 minutes before serving.


As a side note, I know this sounds quite a bit like another recipe I recently posted, but let me assure you – this one is SSOOOO much better!

Tuesday, December 02, 2008

A different take on an old classic

With the Holiday season in full swing, many people will be scanning their cupboards for something fun, and preferably inexpensive to bring to that pot luck, office party or whatever other holiday gatherings.

In recognition of that, Ocean Spray & Heinz have partnered up to bring you a really easy and inexpensive recipe that is sure to put smiles on everyone’s faces.

I am a big fan of simple. I’m also a big fan of inexpensive. So this recipe was perfect for me. 2 steps – 3 ingredients. How much simpler can it get?

The Ultimate Party Meatballs

  • 1 16-ounce can Ocean Spray® Jellied Cranberry Sauce
  • 1 12-ounce bottle Heinz® Chili Sauce
  • 1 2-pound bag frozen, pre-cooked, cocktail-size meatballs
Directions

Combine sauces in a large saucepan. Cook over medium-low heat, stirring until smooth. Add meatballs. Cover and cook for 15 minutes or until meatballs are heated through, stirring occasionally.

Makes 30 appetizer servings.

Slow cooker Preparation: Place meatballs in a slow cooker. Combine sauces and pour over meatballs. Cover and cook 4 hours on HIGH.

In addition to offering lots of other great recipes for those holiday gatherings, the Ultimate Party Meatballs website is also having sweepstakes. The winner will receive $3,000 to throw the ULTIMATE party.

So go check out their recipes, enter the sweepstakes – and have a happy Holiday season :)

Special thanks to Mom Central for giving me the opportunity to share this with you!

Roasted Sausage & peppers

Another meal that I don’t particularly anticipate to be awesome winds up being awesome, and no pictures. LOL

This was originally based on a recipe by Rachael Ray, but I’ve corrupted it enough that now it’s pretty much mine LOL

Roasted Sausage & Peppers w/Spaghetti

  • 1 lb. sweet Italian sausage
  • 2 yellow peppers, sliced into strips
  • 1 red pepper, sliced into strips
  • 1 14 oz. can diced tomatoes or 2 fresh tomatoes, diced
  • Olive oil
  • basil, dried
  • spaghetti, cooked according to directions

Toss strips of peppers with a light coating of olive oil, salt & pepper.  Spread into a single layer on a lined baking sheet and bake for 20 minutes on 350°.

Arrange sausage links on another foil lined baking sheet, drizzle with olive oil and roast those for 20 minutes or until done inside.

(meanwhile, you’re boiling your spaghetti)

Once sausage is fully cooked, slice into 1/2” discs onto peppers baking sheet and toss together to combine.  Add the tomatoes and sprinkle with a generous dose of basil.  All I had was dried, but that worked well.

Once spaghetti is finished cooking, drain and return to pan.  Then add sausage, peppers & tomatoes and all their yummy juices directly to spaghetti pan and toss to coat.

Serve  :)

Wednesday, November 26, 2008

Orange cranberry sauce

1 Bag whole cranberries

1 orange – juiced and zested

1 cup water

1 cup sugar

Bring water & sugar to boil.  Add cranberries, orange juice (1/4 cup was yielded from orange) and approximately 1/2 teaspoon of orange zest.  Because I do not have a zester, I used a vegetable peeler gently – and then chopped it up finely. 

Bring mixture to a boil and then lower heat. Simmer mixture for 15 minutes or until juices reduce.    Remove from heat.  Mixture will thicken as it cools.  Serve :)


1st Boil   Juicing the orange

orange zest

Adding the juice & zest

2nd boil - beautiful colors!

Super Sweet Potatoes

I know I promised to post my menu recipes, but things have a way of smacking you in the head and that’s been the case this week. However, I hope to appease you with some stuff I’ve made today :)

SUPER Sweet Potatoes

6 large sweet potatoes – peeled and cut in half

that’s it!

I wrapped each potato in a piece of aluminum foil.  I placed them on a foil lined baking sheet and baked them in a 350 degree oven for roughly 90 minutes. Then I let them cool all by themselves for an hour or two.  Don’t mess with them, don’t take them out of the foil. Just let them set.

When you’re ready, take them out of their little aluminum and sugar cocoon and into a bowl.  At this point, you can mash them with a fork, they should be so nice & soft.  They have caramelized, and mine, at least, need nothing. No butter, no brown sugar, nothing. They’re simply perfect.

Tuesday, November 25, 2008

Tilapia Croquettes, revisited

I hate it when I make something that I don’t realize is going to be AWESOME, so I don’t bother taking pictures for the blog. LOL  This turned out to be the case last night when I decided to make tilapia croquettes for dinner.  I didn’t have the time nor energy to come up the stairs to print out the recipe, but I was pretty sure I remembered it.  Mostly.  So I set out to eek out dinner despite having a really lousy day, and it turned in to a delicious dinner for everyone, which, in turn, helped make my day better.

1 lb tilapia filets

1/2 c. panko breadcrumbs

1/2 c. Italian flavored breadcrumbs

2 eggs, scrambled

1/2 stalk celery, chopped

1/2 onion, chopped

2 Tbs. olive oil

1 Tbsp. lime juice

2 Tbs. butter

1/4 c. white wine

2 Tbsp. sweet relish

1/2 tsp red pepper flakes


  1. Melt 1 Tbsp butter in skillet and add 1 Tbsp. oil. 
  2. Sauté onion and celery until onion is translucent.
  3. Add fish filets and cook over medium-low heat.
  4. Once fish is cooked through, break it up into chunks and add white wine.
  5. Turn heat to low and allow wine to reduce.
  6. While the fish is cooking, beat the egg in a bowl. 
  7. Add relish and lime juice to egg.
  8. In separate bowl, combine breadcrumbs, salt, pepper & red pepper flakes.
  9. Fold wet & dry ingredients together and add fish, turning gently. You don’t want to shred the fish.
  10. Heat remaining oil & butter in skillet.
  11. Press approx. 1/3 cup of breading and mixture into patties.  Mine made 8 or 9.
  12. Cook in small batches until brown. 

Enjoy!

Saturday, November 22, 2008

My family is SO weird.

I posted our “Thanksgiving” menu on the kitchen bulletin board. 

Thanksgiving Menu:

  • Pot Roast
  • Baked Potato
  • Meatballs
  • Bread
  • Pie

I wanted to see if anyone would notice.  All day went by and nothing. No one mentioned anything.  This morning, I went down to get my coffee and found this note.  

To Mom:  (big smile face)

pie: what kind of pie?????

bread: do you mean biskits?

Nothing about the lack of turkey. Nothing about the meatballs. 

My family is so weird.

Wednesday, November 19, 2008

Yummy Autumn Salad

You know how sometimes, you just start throwing things together, and it turns out either really fabulous or really ... unfabulous?

This salad came out in the first category - FAB U LOUS.

I realize I may be a little late to the game of adding fruit into a salad, but am I ever glad I've finally wisened up! The fresh apples that we happened to pick up this weekend on sale at the WalMart Supercenter for $.35 a POUND came in handy, that's for sure!


Yummy Autumn Salad

  • 2 cups baby romaine leaves
  • 1 plum tomato, quartered
  • 2 slices deli turkey breast
  • 1/4 gala apple, cut into slivers
  • 3-4 slices pepperoni
  • bacon bits (real, not bacos)
  • fat free honey dijon dressing
I layered it all in, then just sprinkled about a tablespoon of dressing on top - tossed it gently and then SCARFED IT DOWN.

The apple woke this salad up! It was wonderful - you have GOT to try it. :)

Sunday, November 16, 2008

12 Days & Counting

Hard to believe it, really. Just 12 days from now, another Thanksgiving! Thanksgiving was always a BIG day in my family growing up. All of us would gather at someone's house, whether it was my aunt & uncle's turn or my mom & dad's turn to host, and as the family grew bigger, so did the turkey. It was a favorite time of year because (maybe it was my naivete') we all had a great time together, and the food was always perfect. Always.


The standard fare was: (to serve typically 15+)

  • A HUGE turkey (20+ lbs at least)
  • homemade mashed potatoes
  • pan gravy
  • mashed butternut squash (they boiled the squash)
  • mashed carrots (boiled those too)
  • my family's recipe for stuffing (to drool over)
  • various other sides, like corn, cranberries (both canned)
  • celery
  • desserts, typically a couple of different pies

After hubby & I moved to New Hampshire and had our daughter, it became impractical to be driving the 3-1/2 hrs down to RI for Thanksgiving with the family, only to rush back to NH for Jimmy to go to work on Friday.  So I began cooking Thanksgiving dinner for my small family.

The first couple of years, I struggled with cooking the turkey the way my mom did and my nana before her.  Last year, I finally – FINALLY – decided to do it like my mother always did – and like my grandmother always did.  It’s not the preferred method of Butterball, but it’s tried and true. Why fight history?

100-9163

Last year, and this year, I’ll be going with this menu and I’ll be posting the recipes over the next few days.  If you are cooking Thanksgiving for your family and/or friends this year, won’t you leave your link so I can come visit you as well?

The menu will consist of:

  • a 12(ish) lb turkey
  • sausage stuffing from my nana’s recipe
  • cornbread & cranberry stuffing
  • oven roasted sweet potatoes
  • oven roasted squash
  • home-made rolls
  • pan gravy
  • home-made mashed potatoes
  • home-made pumpkin pie

I can’t wait!

Reblog this post [with Zemanta]

Thursday, November 13, 2008

Chicken Cordon Bleu & Chicken Fregula

Last weekend, I happened to be watching food network when a (new to me) show came on.   Secrets of a Restaurant Chef with Ann Burrell was the show and I enjoyed watching her and made a note to look for a particular side-dish that she’d made called fregula.  Basically, they’re little balls of pasta.  Bigger than a pastene but smaller than ummm… a ravioli LOL  Otherwise known as Isreali couscous, I managed to find it at the health food store in the bulk bin and it was very cheap.  I only bought what was about 1 cup because I didn’t know if we’d like it.   Then it sat in the paper bag for the last week and a half while I thought about how I’d like to make it.  I wasn’t going to make it like her, but haven’t been feeling really inventive in the kitchen as of late. (Read why on my other blog :S)

So this weekend, I was watching food network again and found myself drooling over Tyler Florence’s version of chicken cordon bleu.  I made sure to buy some proscuitto this weekend, and provolone cheese and then all that got thrown in the fridge as well LOL

Finally, I found the enthusiasm to cook tonight, and oh what a deliciouso dinner!  Give yourself some time for this – but believe me, it’s worth the effort.

Chicken Cordon Bleu

  • 4 boneless, skinless chicken breasts, pounded out flat.
  • 2 slices of prosciutto ham
  • 2 slices provolone cheese cut in half
  • 2 eggs - scrambled
  • 1 cup panko breadcrumbs
  • 1/2 cup flour

I pounded out the chicken breasts with the flat side of my mallet while it was inside a storage bag.    Once they were all an even thickness, I took a slice of prosciutto and tore it down the center because it was quite thick and I didn’t want it to be overwhelming in the chicken.  I topped the ham with the 1/2 slice of provolone cheese.  I rolled the whole thing up slowly and and then wrapped the chicken in wax paper, keeping it tightly rolled.  Once they were all done, I put them in the freezer for approximately 40 minutes or so.

Once they were in the freezer, I began the preparation for the fregula.

Chicken Fregula

  • 1 cup fregula
  • 2 cups chicken broth
  • 1/2 small onion, diced
  • 2 cloves garlic, minced
  • 1 Tbsp. unsalted butter
  • 1 Tbsp. olive oil

In a 2 qt. saucepan, I melted the butter and added the olive oil (the olive oil helps  to keep the butter from burning).  To that, I added the onions and garlic and stirred it frequently to keep the garlic from burning.

Once the onions & garlic were softened, I added the fregula and mixed it in to be sure that it was all coated.  I added the 2 cups of chicken broth and brought it to a boil.  I then lowered the heat, covered the pan and simmered it while I began the prep for finishing the chicken. (probably about 20 minutes on low) – the fregula will absorb the broth, so keep an eye on it.

Back to the chicken, I scrambled the eggs into one bowl.  I placed the flour in another bowl.  In the third, I added the panko breadcrumbs, along with salt, pepper and just a sprinkling of  poultry seasoning.

I removed the packages of chicken from the freezer, where they’d stayed nice and cold, and therefore held together very well.  Working quickly, I dipped each chicken breast into the flour, coating it on all sides.  Then I dipped it into the egg and then finally coated it in the bread crumbs. 

In a skillet, I heated a Tbls. of canola oil and placed the breaded chickens into the skillet.  At this point, I don’t know WHY but I had the heat up too high and next thing I knew, I could smell burning breadcrumbs.  Gah!

So I took them out of the frying pan and placed them into an oven pan, put the oven on 425 and cooked them for roughly 30 minuts or so – I had the meat thermometer in them and took them out at 175°. They were moist & delicious! The fregula plumped up with the chicken broth and was just amazing.  (click on the photos for better detail)


101_0949

101_0950


 101_0953

Friday, October 31, 2008

Time is running out!

Today is the last day to enter my cookbook giveaway over at my new review blog, Dawniemom Reviews.  OF course, I can’t remember if I even told you about it here or not, but in any event, get over there and enter! :)

Wednesday, October 29, 2008

Cristina Ferrare’s Chicken Pot Pie with Cornbread Crust

I watched Oprah last week when she had Cristina Ferrare on, talking about how to stretch your dollar in today’s lousy economy.  She prepared this and it just looked so good, I had to try it.

Filling:

  • 1 Tbsp. olive oil
  • 1 Tbsp. unsalted butter (I omited this, but used more olive oil)
  • 1 medium Onion , chopped
  • 1/4 cup flour
  • 2 cups chicken stock
  • 2 cups chopped Roasted Chicken (I used roasted boneless chicken breast)
  • 1/2 cup frozen sweet petite peas
  • 1 potato , diced and boiled
  • 1 1/2 cup chopped, cooked carrots
  • 1/2 tsp. salt
  • Cracked pepper
  • Dash of Tabasco® sauce (I omitted this)
Crust:
  • 3/4 cup white or yellow cornmeal
  • 3/4 cup flour
  • 1 Tbsp. baking powder
  • 1 1/2 Tbsp. sugar
  • 1/2 tsp. salt
  • 3/4 cup milk
  • 1 large egg
  • 2 Tbsp. canola oil

To make filling: Preheat the oven to 400°. Spray a 2-quart casserole with cooking spray. In a large sauce pan, heat olive oil and unsalted butter together. Add onion and sauté until tender, about 4 or 5 minutes. Add in flour until blended. Slowly stir in 2 cups of heated chicken stock, whisking well. Cook mixture over medium heat until thickened and bubbly, about 4 minutes. Stir in chicken, peas, potato, carrots, salt, pepper and Tabasco®. Pour into a 2-quart casserole dish coated with cooking spray and cook until heated and thickened. Spread eventy into an ovenproof dish. 
To make crust: In a bowl, stir cornmeal, flour, baking powder, sugar and salt. Stir milk, egg and canola oil until well combined. Stir wet ingredients into dry ingredients. Spoon the batter evenly on the filling. Bake until the top is golden brown, about 22 to 25 minutes.

101_0877

My finished product.  In the prep, I had to use more than 2 cups of broth – and then, after it was baked and spooned out into the bowls, I found that the corn bread had absorbed virtually all of the “gravy” , so I thought it to be kind of dry.  Everyone else loved it.  I’m not sure how else I’d fix it to make it better though.  I will say, though, that it was extremely satisfying to make something completely from scratch!  No canned veggies, no boxed corn bread. Everything fresh!  It’s much cheaper too.

Saturday, October 25, 2008

More linky love

So, as I mentioned, I went to BlogHer Boston and heard these amazing women talk about cooking and blogging and the food blogging community. They mentioned a few sites that they enjoy and I've just finally gotten a chance to take a look at some of them, and O M G. You've GOT to check them out - just don't get zapped licking your computer screen.
  • Food Gawker - their tag line is "feast your eyes" - and it's SO true!
  • Photograzing - similar to Food Gawker - another delicious resource.
The main idea of the Social Media Can Save Dinner is this: The food blogging community is both huge and generous. So getting traffic to your blog is entirely possible when you start visiting AND COMMENTING on other people's blogs - it's the same basic concept for any type of blog. I didn't use to have a lot of food blogs on my blog roll because I'm a google girl. When I need help with a recipe, I google it. Of course, if we ALL did that, no one would have any kind of traffic on their blogs, and we'd all just sit here getting depressed at our stats and lack of comments. So I'm going to try to get to more food blogger blogs, introduce myself, try your recipes and make some new friends :)

So - tell me - who are your favorite food bloggers? Leave me your link and their link in the comments and I'll be by!

Thanks!!

Friday, October 24, 2008

Good news!

I've been doing product reviews for several months over at my other blog, Coming to a Nursery Near You. However, since I've been doing more than even I'd want to read instead of actual news, I've begun my own review blog, Dawniemom Reviews (original, right?). So the GOOD news for you guys is that I'll also be doing giveaways there and from time to time, I'll post here when there's a giveaway over there. How's that? I'll also post here when I review a food product over there. So go take a look, perhaps add me to your feed reader, or just say hi :)

Also, I went to BlogHer Boston earlier this month and it was SUCH an incredible experience! One of the sessions, "Social Media can save Dinner" caught my eye specifically, and through that, I was introduced to some more food bloggers, which is ALWAYS cool! Kalyn's Kitchen, The Perfect Pantry and Nika's Culinaria all feature mouth watering recipes AND photos. I'm sure you'll love them as much as I already do.

Monday, October 20, 2008

Lots of good stuff! (edited)

I haven’t been doing much of making up my own recipes, but I figured that since I haven’t updated here in a while, I thought I’d share with you what I’ve been making.

DSC_8892 THIS bread recipe is INCREDIBLE! I’ve never made my own bread other than in the bread machine, so I wasn’t so sure how it would do – but it was AWESOME! And it’s so much cheaper than buying bread! - (Sorry, had the wrong link in there. LOL)

I also revisited my OMG THIS IS SO GOOD apple pie, and this time, cut both of the sugars by half and it still turned out fantastic!

DSC_8890Because we were still working on the apples we picked last MONTH, I even bought this candy apple mix and made them!

I will probably finish the apples off by making some more apple sauce – if I can find a better way to sweeten it without it tasting like a jarred applesauce.

So, what have YOU been cooking?

Wednesday, October 01, 2008

Going Pink for October

Go Pink for October and support Breast Cancer Awareness Month

October is Breast Cancer Awareness Month - please support this important topic by educating yourself about breast cancer. Similarly, join the "movement" and pinkforoctober.org. Finally, do what you can to donate to the Susan G. Komen foundation, or ANY that raises money to help fight this horrible disease.

Thank you.

Wednesday, September 17, 2008

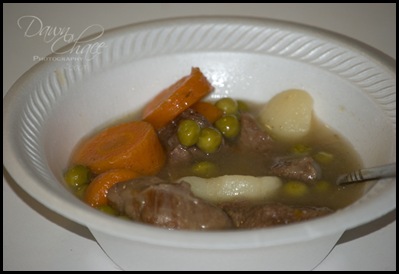
Beef Stew

This recipe has been handed down by several generations in my family. I am sharing it here simply because it’s SO good. :)

stewsm

  • 3 large carrots, sliced in 1/4” chunks
  • 2 16 oz cans potatoes (not the way my nana made it but it’s all I had this week)
  • 1 4oz. can peas
  • 2 lbs. stew meat – this particular time, I left the chunks big.
  • 1 large onion, cut into chunks
  • 1 Tbsp. olive oil

In a big pot, brown the onions in the olive oil.  Add the stew beef and brown it.  It does not have to be cooked through.  Add water to cover the beef (plus maybe an extra inch).  Bring to a boil, and then simmer for a few hours. There’s really no wrong way to do so, as long as the meat becomes tender.  Add the carrots midway through.   After about 2 hours of simmer, add the peas and carrots.   Bring back to a boil.

In a bowl, add 1/4 cup of flour and whisk a small amount of water into it until you’ve got a smooth mixture.  Slowly add this to the boiling stew – this will thicken your stew.  It’s really easy, and wonderfully YUMMY! :) 

As for spices –I add salt & pepper when I'm cooking the meat - but I leave this up to you and your preference. 

Also, with regards to the potatoes - this was the first time I used canned potatoes, and they actually came out very good in this - typically, using real potatoes, while good - tends to make the potatoes get kind of mushy.  These stay firm but meld well with the flavors of the vegetables and meat. :)

Enjoy!

Saturday, August 16, 2008

I love me some FoodNetwork!

Ok, so to celebrate the new shows on FoodNetwork, A Cowboys Wife is having a giveaway!  I know *I* love giveaways, especially those centered around food or cooking or both.  So, you HAVE to go over there and celebrate with her. You just have to.  Go ahead, I’ll meet you there.

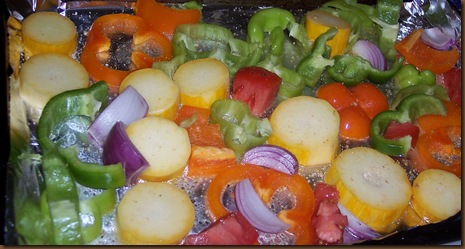
Oven Roasted Veggies

I’ve started eating like an adult instead of a 12 yr old, and with the help of my Tweightloss friends, I hope to start losing some of this post-baby, post-surgery weight I’ve put on.  And maybe some more.  Here's what I made the other night, along with a grilled chicken breast. It was DELICIOUS.

Also, it's my entry for this week's Photohunter theme, "Colorful".

VEGGIES

  • 1 lg. italian pepper
  • 1 red onion
  • 1 red pepper
  • 1 yellow squash
  • 2 tbsp low-fat salad dressing

Spread the salad dressing over the foil line baking sheet. Spread veggies out in a single layer. Bake for 30 minutes on 400°. Serves 2.

Thursday, July 31, 2008

Steak & Summer Veggie Stir-fry

Sorry folks, I know I could come up with some sort of name for this, but it’s been a really long day and I just wanna post it before I forget to share it with you.


Steak & Veggie Stir-fry

1 fair-to-middlin sized zucchini, washed well (not peeled)
1/2 lg onion, sliced thin (not paper thin though)
1 Tbs. butter
1 cheapo steak, cut into 1/2 inch or smaller strips (I used bottom round)
garlic salt
tomatoes – 1 lrg fresh tomato or more if you really like tomatoes :)
pasta of your choice – I used spaghetti because I was out of angel hair

So, I had some leftover oven roasted tomatoes I’d made earlier this week so I used those but you could use some nice fresh ones too. Also, if you use fresh, throw in a clove or 4 of garlic, sliced thin.

  1. 1. Melt butter in skillet. Toss in onions and let them begin to sweat while you’re slicing the zucchini into the pan as well. Cover and let them steam/sweat for a few minutes. Do not slice the zucchini TOO thin or it’ll fall apart, and this dish is much better when you can bite INTO the zucchini.
  2. 2. While the veggies are cooking, slice up your steak. Also, put on a pot of water to boil for your pasta.
  3. When veggies are tender (don’t let them get mushy), remove from skillet to a plate. Add pasta to boiling water.
  4. 3. Place steak strips in same pan, and sprinkle with your garlic salt or other seasoning of choice. I used McCormick’s Pepper & onion seasoning. It’s my new favorite :)
  5. 4. Simmer steak strips, turning once and being careful not to overcook. Once pasta is cooked, add veggies back to pan, then add drained pasta to skillet as well – toss gently and serve.

You might also sprinkle some parmesan over the top if you are so inclined. As well, some nice bread would finish this off perfectly!

I’ve also enjoyed this with chicken instead of beef. As well, I’ve enjoyed it without meat – but I prefer meat in everything!

Enjoy!


Tuesday, July 22, 2008

Yummy for you

I will admit that this post is WAY late, but hey, better late than never!

I found the MOST amazing recipes just before the 4th of July holiday weekend, and decided to try them all.  Here are my results, and of course, PLEASE visit the original sites to see their other amazing recipes as well :)

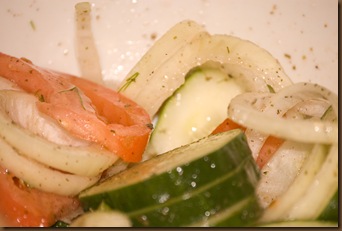
First up was this wonderfully fresh, wonderfully easy cucumber & tomato salad.  It literally took me just minutes to put together, and it was SO delicious!

salad

Now, of course, I did not know it was going to come out good enough to blog so I didn’t take pictures along the way LOL Isn’t that always the way?

Anyway, I originally found this recipe over at My Wooden Spoon but modified somewhat, so I thought I'd give you the modified recipe, and of course, a link to her recipe as well :)

Tomato & Cucumber Salad

First off, I halved the recipe because I'm the only one who likes this stuff so if you have a buncha folks who would like it, be sure to double :)

  • 2 medium tomatoes quartered & then eighth'd?
  • 1 medium cucumbers, sliced
  • 1 onions, sliced and separated into rings
  • 2 Tbsp. Vinegar (I used white)
  • 1/4 c. Oil, I used Olive Oil (I believe I used canola, as I had no olive)
  • 2 Tbsp. Sugar
  • 1 tsp. salt
  • 1/2 tsp. black pepper
  • 2 tsp. minced parsley - although I used some fresh basil and dill out of my garden, along with some dried parsley I had in a jar.

First, slice, chop & dice to your heart's content.  I left the tomatoes kind of big because in the past, my tomato salads wind up being mush.  I don't like mushy tomatoes - so I went with bigger quarters.  In a separate bowl, I whisked the vinegar, oil, sugar (making sure the sugar dissolved), and I left the salt & pepper for last.

Finally, I gently folded everything together with the dressing, put it in a sealed container in the fridge for about 2 hours or so and served it with lunch (recipes forthcoming) :)  IT was AWESOME!  Even my daughter ate some!  

Enter My Weekly Giveaways May 1 thru July 31By the way, speaking of the Wooden Spoon!  She’s got a FABULOUS giveaway going on now through the end of July (next week!).  She’s giving away 2 NIIIIICE knives - go over and check it out!


Tuesday, June 03, 2008

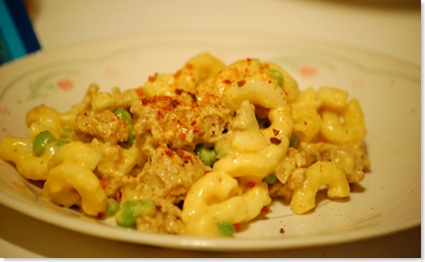
Turkey Mac & Double Cheddar

Do you ever have something in mind planned for dinner and then when you go to make it, find you don't have a key ingredient?  That's what happened to me this evening.  I'd planned on making the low-carb Mexican casserole for my family for dinner.  At 4pm, which is normally when I go down to make dinner, I found I had no taco seasoning. 

Now of course, I could have scanned the Internet for a solution, but nahhhh, I sat and sulked on twitter for a few minutes.  Then I went back downstairs to figure out what else I could make. 

I had a jar of Ragu Double Cheddar cheese sauce that I'd had forever.  I looked at the back and found a recipe that sounded pretty good - at least, I figured, the kids would probably like it.  The problem was, I had ground turkey already defrosted, and no time to defrost hamburger, so I was going to have to substitute the turkey for the burger it called for.  Eh, who cares, really - I was going to have a salad with some leftover chicken in it from last night's dinner (heh).  What I wound up making, with some of my own tweaks, came out SO GOOD, I didn't have my salad, I had what I'd made for them! LOL

Here's what you'll need:

  • 1 lb (or more) ground turkey (7%) - browned and drained
  • 3-1/2 cups water (I wound up using closer to 4 cups)
  • 2 cups uncooked elbow macaroni
  • 1 jar Ragu® Cheesey Double Cheddar Sauce
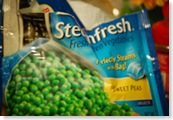
  • 1/2 - 1 cup sweet peas
  • 2-3 tsp (or Tbls)


peas
Brown the ground turkey in a skillet.  Drain the grease (I know - there isn't alot) and set turkey aside.  In same pan, bring the water to a boil.  Add pasta and cook for 6 minutes or until tender.  (Mine took closer to 10 minutes and I had to add water to it.)  Do not drain pasta.  Return ground turkey to the pan, add in sauce.  This is when I also threw in the sweet peas.  Blend it all up and heat through.  
sweet
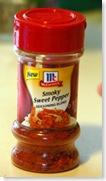
When I'd dished it up, I spotted the McCormick Smoky Sweet Pepper Seasoning.  I sprinkled it over the pasta & turkey and let it sit for a few minutes or so, to help it dissolve/blend.   Oh MAN did that make a difference!   It really was awesome. 

yummy

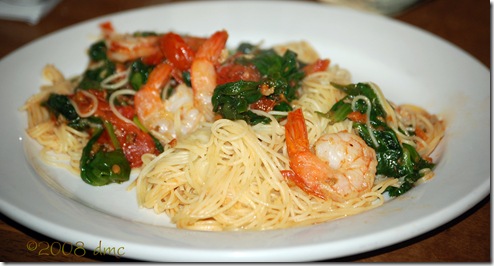
Shrimp & spinach w/angel hair

I literally threw this recipe together this weekend.  It was delicious!

  • 2 c. fresh baby spinach
  • 3 cloves garlic, crushed
  • 1/4 c. oven roasted tomatoes (recipe below)
  • 12 large shrimp
  • 4 oz. angel hair spaghetti


Using the oil from the roasted tomatoes, brown the garlic.  Once the garlic is fragrant, add the spinach and begin to wilt it. After the spinach has wilted, add in the tomatoes. Allow the juices from the tomatoes coat the pan, and then add the shrimp. If you’ve bought pre-cooked shrimp, just heat them up and toss with tomatoes & spinach.  Otherwise, cook until the shrimp have turned pink.

When pasta is finished, drain and add pasta to pan and coat. Serves 2.

Oven Roasted Tomatoes:

To roast the tomatoes, I had about 6 tomatoes that were ready to turn. I coated a cookie sheet with a few tablespoons of olive oil. I cut the tomatoes into 6ths (making sure they were about 1/2” at the most) and spread them out on the cookie sheet. I drizzled some more olive oil on them, sprinkled with Italian seasoning and garlic salt. I baked them at 300 degrees for about 90 minutes or so, then shut the oven off and left them in there most of the day. They were EXCELLENT alone, but also perfect for the shrimp thing. :)

shrimp&spinach

Monday, May 19, 2008

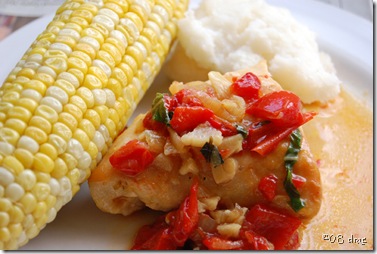
Garlic Chicken w/sweet roasted pepper sauce

I've been cooking up all sorts of yummy new meals, and decided I just had to take some time and actually post them!

This recipe comes from a new sort of program that Shaw's Supermarkets has going on with America's Test Kitchens - they provide the recipe cards, free - and of course, you buy the ingredients (cute how that works huh?).  In any case, that's where this recipe comes from! 

Garlic Chicken w/Sweet Roasted Pepper Sauce

  • 4 boneless, skinless chicken breasts
  • salt & pepper
  • 2 Tbls. vegetable oil
  • 1 sm. onion, sliced thin
  • 6 garlic cloves, sliced thin
  • 1 12oz. jar roasted red peppers, drained & chopped
  • 2 tsp. sugar
  • 1-1/2 c. low-sodium chicken broth
  • 1/4 c. fresh basil, chopped
  • 2 Tbls. unsalted butter

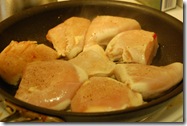
In my photo, you'll see more than 4 chicken breasts because the ones I had were really big, so I cut them in half to cut down on cooking time.

chicken_pan Pat chicken breasts dry and season with salt & pepper. Heat oil in large skillet over medium-high heat.  Cook chicken until golden brown, about 5 minutes per side.  Transfer to plate.


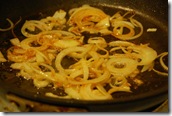
onionsAdd onions to fat in the skillet and cook until lightly browned, about 3 minutes.  Stir in garlic and cook until fragrant, about 1 minute.  


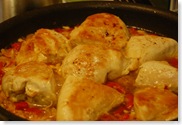
in_the_pot

Add peppers, sugar, broth & browned chicken, along with any accumulated juices and bring to a boil.  Reduce heat to medium and simmer until chicken is cooked through, about 5 minutes (make sure your chicken is 160°F please!)  


Transfer chicken to serving platter and tent with foil.  Return skillet to high heat and simmer until sauce is slightly thickened, about 5 minutes.  Off heat, whisk in basil and butter.  Season with salt and pepper.  Pour sauce over chicken & serve.

chicken_finished

It really was as good as it looks!  It was very quick to make (their whole series is 30 minutes or less recipes) and I'll definitely make it again!


Wednesday, May 07, 2008

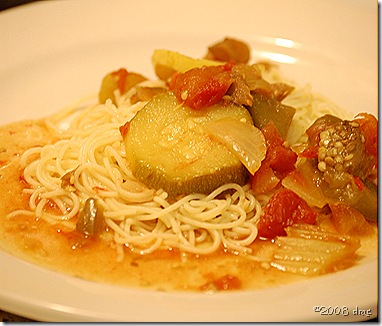
Ratatouille - no, not the movie!

LOL My kids & I just saw the movie Ratatouille last week and they were intrigued but the idea of the FOOD ratatouille.  But I KNOW that my oldest does not LIKE most vegetables - my daughter will, on occasion, depending on her mood, either love them or hate them.  BUT I LOVE THEM.  So I figured I'd make it and cash in on the popularity of the movie. 

I looked around the net for an interesting recipe - there's so many variations.  I wound up making my own because I wasn't paying attention LOL  It came out SCRUMPTIOUS and my kids RAVED over it.  My oldest, mr. only likes green beans, asked for 2nds... and 3rds!

ratatouille-yum


  • 1 medium sized eggplant, peeled and cut into approx. 1" chunks. (I didn't seed it either)
  • 2 medium sized zucchini (not peeled), sliced
  • 1 medium sized yellow squash (not peeled), sliced
  • 3 stalks celery, chopped
  • 1 medium onion, chopped
  • 2 green peppers, seeded and chopped (but left in good sized chunks)
  • 1 14 oz can tomatoes (with onions)
  • 1 beefsteak tomato, quartered and eighth'd? LOL
  • 1 tbls. olive oil
  • 3 large cloves garlic, sliced

In a pot, I sauteed the onions and garlic.  Once the onions were transluscent, I added the green peppers - covered the pot and let them cook down some.  To that, I added the eggplant & tomatoes and then simmered  it, covered, for about 15 minutes - or perhaps 20.  Finally, I threw in the celery & squashes.  Again, I covered it and let it simmer while I cooked up a pound of angel hair spaghetti, which I served the ratatouille over.  Truly, this was a delicious meal!  It did need some salt, but we added that individually - and it was even better when we added parmesan cheese.  All in all, a BIG success in my house!

Enjoy!

Tuesday, May 06, 2008

How time flies!

Wow - this blog is going to be 3 years old in a couple of weeks! Woohoo! I'm trying to come up with a way to celebrate. Have any ideas? Let me know!

Wednesday, April 09, 2008

Crockpot Cooking at it's finest

I was feeling pretty uninspired this morning when I was digging around in the new chest freezer we'd bought last month.  I know that in order to keep the food from getting freezer burned, I must use it!  So I reached to the bottom and pulled out a family sized package of chicken thighs.  Hmm... what to do with them?  Again, completely uninspired, I ran them under some hot water just long enough so I could whack them on the sink to break them into 2 chunks small enough to fit into the crock pot.  I sprinkled onion salt and garlic powder liberally, then I opened a 28oz can of diced tomatoes and poured that on top.  I covered it and turned it up to high.

Around noontime, I was looking in the regular freezer and came across some sliced zucchini I'd made before our vacation - to be honest, I can't even really remember how I cooked it - it may have been in Italian dressing, but one can't be too sure.  Eh, that's ok - I tossed the frozen lump of zucchini into the crock pot as well.  About an hour later, it was defrosted enough for me to stir the whole thing up, making sure the zucchini got covered up in tomato'ey goodness.  The aroma in my house is Soooooo Goooood!

In about an hour, I'll go back to the kitchen and stir things up again and also put on a pot of water to boil.  I'll make some sort of pasta (not really sure what I have at the moment) and poof - dinner will be done!  The zucchini is very thinly sliced, so I'm betting it'll fall apart nicely - because my kids don't purposely EAT zucchini, this is a good thing that it falls apart :)

DSC_2151

Now, for those of you who aren't too thrilled with chicken thighs, this recipe could easily be accomplished with any other cut of the chicken, just adjust your cooking times for boneless!

Also - if you'd like the chicken to be browned, you could brown it in the frying pan before or spoon the whole thing into a casserole dish when it's done and throw it under the broiler.  Me? I don't mind albino chicken!

Enjoy!

To recap:

10-12 chicken thighs (frozen)
1 28oz can diced tomatoes w/juices
garlic powder
onion salt
sliced zucchini

Yum!